Sunday, February 16, 2014

shaping the skeg

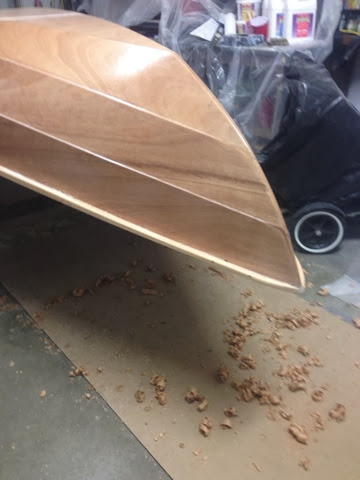
quick post:  rasped. planed, and sanded the skeg today 

will coat w epoxy then move to the interior of the boat tomorrow

Monday, February 10, 2014

skeggerator

well, the two halves of the skeg came together quite well but when the epoxy dried I noticed that there was a slight bow in the skeg moving from aft to forward.  this would require some ingenuity... 

once i got her upside down i measured the center line. finding the center of a round bottom was also not easy, so fatboy and myself popped a chalk line to guide us.

i glued the skeg and drilled in two screws....into the back half of the skeg, keeping the back half (alone) center. the front half remained bowed towards the port side of the boat. 

then i used masking tape to 'pull' the front half of the skeg back to center and drilled away. 


you can see the two sister tapes on the right here pulling the anterior skeg back to midline. 


then....
epoxy fillets on both sides. they require patience, but im starting to feel like an expert


ill add a 'sacrificial' wood strip to the bottom of this skeg tomorrow for hard landings. 


mom, dad, and meme came down for supper tonight so the family and i went to the grocery store today. as you can see the boys were having fun in the cart!


Saturday, February 8, 2014

rails part 2....first router experience

shaping up the rails today. borrowed a router from wills golf cars and used a 1/4 inch round over bit. 
had to practice on some old 2x4s....it didnt go well at first but once i got the depth set up correctly, it went beautifully. 


i still sanded over top with 220 grit. 

the stems came out ok too. 

then i covered her with the first coat of epoxy and will let it cure overnight. 


also went ahead and filled some gaps on the interior

to get an early start on the daggerboard trunk, i coated the skeg and the trunk as well. 


now i just need to get my garage warm enough for this stuff to cure!


Friday, February 7, 2014

finishing the rails part 1

i flipped her over and shaped up the underside of the rails today after work

first, i used my jig to round off the ends


they arent perfect but they're close. 


then i flipped her and planed the outer rail flush on the taper


you can see the taper, fully planed, on the left and the non-tapered rail on the right. 

after some sanding and shaping, she looks great!

you can really appreciate the taper here, moving left to right. 

tomorrow, ill rout the top of the rail and try to atart epoxy'ing the rails and breasthooks


Tuesday, February 4, 2014

away with the clamps

took the clamps off tonight. i gave em a good 48 hours to cure. 
my mahogany rails held fast. 

i planed them flush from end to end. 

next step will be planing in the taper on the bottom side of the outer rails. 

ill get J to help me flip her over tomorrow night.


Monday, February 3, 2014

outer rails....

well the first rails stuck nicely. the glue worked like a charm and the hull was much much stronger with this addition


it really looks like a boat. 


i added the second rails without much trouble. it was time consuming and tedious but pretty easy. 


i hand-sawed the ends so they would take the clamps. 


since the skeg is the next step, i went ahead and glued the two sides together. 

next up.... the skeg. 


Saturday, February 1, 2014

planing, then adding rails

well i have been planing the past few days. the goal is to taper the underside of each rail about 1/4 inch over a span of about 38 inches from each end. 

when i first used it, my planer was a disaster. 
after i watched a few youtube videos on how to set it up properly, the planer worked a lot better. 


here is O helping out

i clamped the rails together so that each (inner) rail would have a similar taper. 

you can see a slight taper here moving from right to left. 
the planer worked quite well once i got it squared up. 

once i finished the taper, i started attaching the rails. this was tedious but easier than i thought. 


you can appreciate the taper some here

the screws split my mahogany!  
its ok....  these screws are coming out and ill just glue them back together (hopefully). 

used 48 clamps!!!


tomorrow....the outer rails!