Wednesday, March 26, 2014
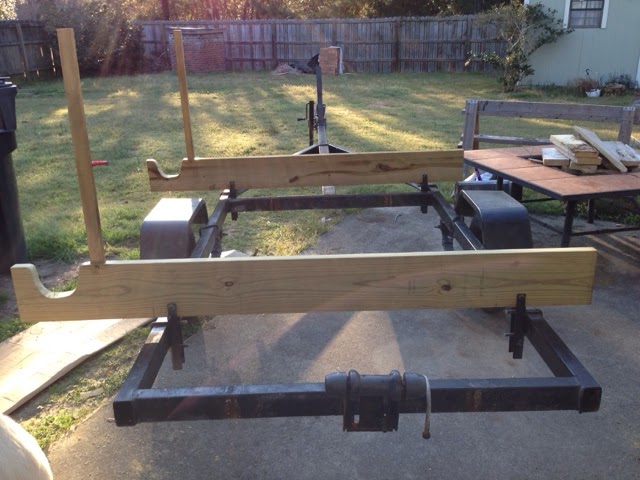
trailer modifications
rhett (aka the fresh prince of pender county) founde this used trailer near the beach so i started modifying it so i could carry both my skerry and my wifes new paddleboard.
Tuesday, March 11, 2014
seats are in
well the seats are in
now i am waiting on the sailing kit so i can install the mast step
i also re-coated the skeg with resin for another layer of protection
Monday, March 3, 2014
in with the seats
had to start by cutting a daggerboard slot in the middle seat
i (with O's help) clamped it down so i could rout the slot.
you can see my router guide marks here
clamping the yardstick down really helped to guide the router this time (as you can see on the left)
the slot was much straighter than the bottom. it fit pretty nicely. we'll see when i get the daggerboard together.
next i trimmed up the seats and glued em in!
used all the heavy stuff in my garage to hold them down until epoxy cures.
28 degrees outside tonight so ill give it at least 24-36 hours
Sunday, March 2, 2014
fillets (pronounced fill-its)
well
i used my wife's cake icing bag to place fillets along the interior today.
they came out fine, ill post pics of the final product later
next....seats
Friday, February 28, 2014
daggerboard trunk
time for the daggerboard trunk.
i started by being sure i was centered. this wasnt as easy as it sounds, but after a lot of measuring i was pretty close.
i had already assembled the trunk.
i trimmed up the edges and coated with resin.
next came the first of many uncomfortable steps..... drilling holes in the bottom of my boat.
i centered them up and started at the ends of the slot.
owen helped!
'cheese'
next jennifer came and helped me flip it so i could cut the slot with my router
the router was hard to keep straight but does pretty work. i used a 3/4 inch bit.
i sanded the interior edge by hand and used a rounding bit to round off the bottom edges.
you can see here the slot is not perfect but close.
after some hand sanding she cleaned up nicely
next i flipped her back over and wet the trunk with resin, then screwed her in and put down some fillets
Monday, February 17, 2014
jan 16: interior glass
glassed the inside today. not nearly as easy as the outside was.
here she is with freshly wet cloth and
i fashioned this stand to hold the stern end of the boat off of the floor and keep the skeg from breaking
you can see it in action here. not much to it but very functional.
then, it was all about measuring the cloth, and mixing up 16+ounces of resin.
the cloth is so porous that its easier to shape than you might think. it was very messy though when wet.
heres the bow. you can see the excess cloth above the garboard seam.
i trimmed it with a straight razor but it still isnt perfect and is gonna need some sandpaper magic.
theres the final product
needs sandpaper next.
Sunday, February 16, 2014
shaping the skeg
quick post: rasped. planed, and sanded the skeg today
will coat w epoxy then move to the interior of the boat tomorrow
Subscribe to:
Posts (Atom)