Saturday, April 26, 2014

sand and zspar varnish

well i sanded the whole interior today w my deWalt palm sander. started with 80 grit and worked down to 120. 

notice the grey color of the hull after running over the epoxy w a sander


looks awfully dull

then, after a few coats of pettit zspar, 

she looks amazing. 


really glossy. 


i also finished the rudder assembly today

this will need some finish work


finally, the mast partner. i had a good friend and neighbor sign it, then i burned in his signature so the boys would know who christened the boat


Friday, April 18, 2014

masts!

well I finally got my mast kit in the mail and started putting the mast, mast step, rudder, and daggerboard together.

its been a rough few weeks so time has been really limited....a month ago i had planned to be finished by now!


theres the assembled mast step. once i drill these final holes in the bottom for mounting this bad-boy ill be done drilling holes in the bottom of my boat!


theres the rudder


and i finally finished my trailer modifications. 
thats outdoor carpet from lowes covering up 1 inch pipe insulation underneath used for cushion


next up.....attaching the mast step, finishing the rudder and daggerboard assembly ......
then
paint and varnish!!!!!


Wednesday, March 26, 2014

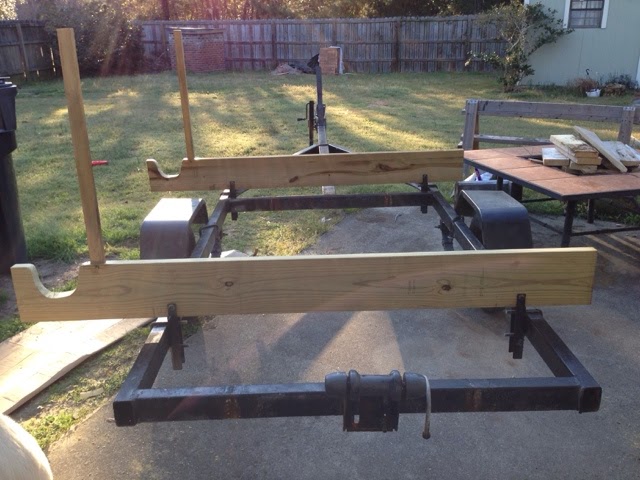
trailer modifications

rhett (aka the fresh prince of pender county) founde this used trailer near the beach so i started modifying it so i could carry both my skerry and my wifes new paddleboard. 


i want to be able to store her upside down but transport 'right-side-up'

so i borrowed an airgun from will and adjusted the brackets for a more horizontal approach. 

its simple. used 2x8s measured to the skerry's beam plus a few notches cut out for the paddleboad. 


Tuesday, March 11, 2014

seats are in

well the seats are in
now i am waiting on the sailing kit so i can install the mast step

i also re-coated the skeg with resin for another layer of protection


the paint and varnish are in so as soon as i get the rudder and mast step installed, ill paint....then im done!

Monday, March 3, 2014

in with the seats


i added seats today

had to start by cutting a daggerboard slot in the middle seat


i (with O's help) clamped it down so i could rout the slot. 


you can see my router guide marks here

clamping the yardstick down really helped to guide the router this time (as you can see on the left) 
the slot was much straighter than the bottom. it fit pretty nicely. we'll see when i get the daggerboard together. 

next i trimmed up the seats and glued em in!

used all the heavy stuff in my garage to hold them down until epoxy cures.

28 degrees outside tonight so ill give it at least 24-36 hours


Sunday, March 2, 2014

fillets (pronounced fill-its)

well
i used my wife's cake icing bag to place fillets along the interior today. 
they came out fine, ill post pics of the final product later

next....seats


Friday, February 28, 2014

daggerboard trunk


well ive been busy with meetings and call all week so i just got back to the boat. 

time for the daggerboard trunk. 
i started by being sure i was centered. this wasnt as easy as it sounds, but after a lot of measuring i was pretty close. 

i had already assembled the trunk. 

i trimmed up the edges and coated with resin. 

next came the first of many uncomfortable steps..... drilling holes in the bottom of my boat. 
 i centered them up and started at the ends of the slot. 


owen helped!
'cheese'

next jennifer came and helped me flip it so i could cut the slot with my router


the router was hard to keep straight but does pretty work. i used a 3/4 inch bit. 

i sanded the interior edge by hand and used a rounding bit to round off the bottom edges. 


you can see here the slot is not perfect but close. 
after some hand sanding she cleaned up nicely

next i flipped her back over and wet the trunk with resin, then screwed her in and put down some fillets


i was pretty happy with the result